Welcome to the Van Tour, we’re Mindy and Joe.
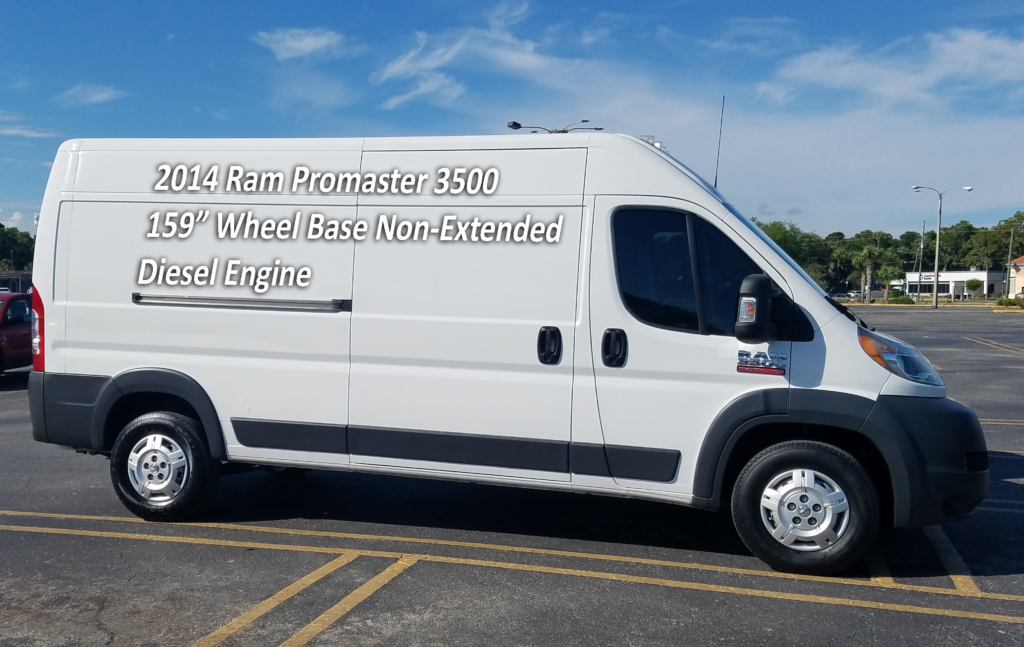
In 2019 we bought our 2014 Ram Promaster 3500 non-extended cargo van with a diesel motor and 80k miles on the odometer.
We then spent the next 6 months building our van into a home on wheels.
Before we get into the van tour, here is a little about us.
Joe is a US Navy Veteran and was a personal trainer working at 4 different facilities from 5 am to 10 pm, with a couple hours off in between training sessions, and selling tea, for our friends business TeaNationUSA, at markets all over Florida and trying to get his blog Livftinglife off the floor.
Mindy was working a remote 9-5 job, building custom websites, doing market photography, starting her own blog BudgetbyDesign, and being the best dog mom and wife ever!
We have been married since 2016, have way to many hobbies and both have serious wanderlust.
Here are some of our hobbies most of which fit in the van
Leave a comment if you share any of them!
- Hardcore Foodies – we will go extraordinarily out of our way for good food
- Amature connoisseurs of anything with alcohol in it
- Outdoor enthusiasts – Hiking, Kayaking, Paddling, Camping, etc.
- Motorcycles
- Scuba
Those are just a few of the many interests we have and we are sure there are many more yet to be discovered.
Now that you know a little bit about us, let’s move onto the van.
Facts about our Van:
There were some key reasons that we chose our van. Number one being Price.
We were working in a $30k total budget and knew that we wanted a solid base to build on.
And so the hunt began.
We searched every day for 6 months, going back and forth with ideas, different vehicle types, downsizing and of course, test driving every single one with potential.
The key features we needed were surprisingly difficult to find in our price range, but with a little patience and many near misses we finally found it.
That’s how we landed on our Promaster. Luckily, we found it sitting in a dealership lot just 3.5 hours away.
After 6 months of relentless searching, we knew we had found the van for us.
What were our key features when looking for our van?
We have a lot of hobbies and at the time, we had 2 senior citizen doggos, which unfortunately have gone to doggy heaven.
This all meant that we needed a pretty large van, yet we still wanted to fit into a standard parking space.
This left us with 2500 and 3500 models of the currently available large cargo van market.
Here is our list of requirments:
- High roof
- Diesel
- Under 100k miles
- Fits into a parking space
- $20k or less
As you may have guessed, we found such a van.
What made us choose those requirements?
Joe is 6ft and Mindy is 5ft 8 in and we both decided that standing was a necessity, which to this day, we are very happy with that decision. This meant that anything other than a high roof was off the table.
The next requirement was a diesel motor. Diesels are better long term motors than gasoline for a few key reasons.
- Better MPG under load
- We maintain 20 mpg avg. Even at 70 mph.
- Diesels run at a lower RPMs
- This creates a longer engine life
- Four Season Living
- We planned on installing a Diesel heater for the cold months and did not want a separate tank for the heater fuel.
- Diesel is widely available everywhere in the world
Thirdly, we wanted to fit into a parking space. This may seem a bit silly, but this is our daily driver and we did not want to miss out on certain experiences due to the vehicle being to large to park. This decision has worked out very well.
We also wanted a, relatively, low mileage vehicle. Better yet, our van was a single owner and the maintenance was all performed at the dealer we bought it from. That was pretty great.
The last, but most important, was the price. Thanks to countless hours of obsessive research, we knew that we could build out our van for $10k. This left $20k for the vehicle.
Now that all of our requirements were met, we brought the van home and for the next 6 months we put our home on wheels together.

The Conversion of our Van
The first thing we did was repair/ replace parts that we needed too.
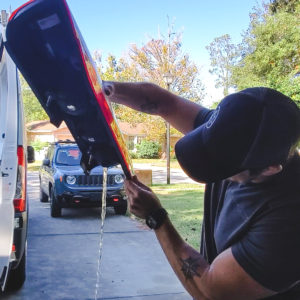
We ended up replacing 2 damaged light assemblies…and change out our blinker fluid.

Then we had to put on a new hitch receiver and beef up the rear suspension with the addition of Sumo Springs (link to install video here)

After fixing those issues, it was time to move onto the build.
We wanted to live fulltime in the Van, so spent more money in certain areas and went the affordable route in others.
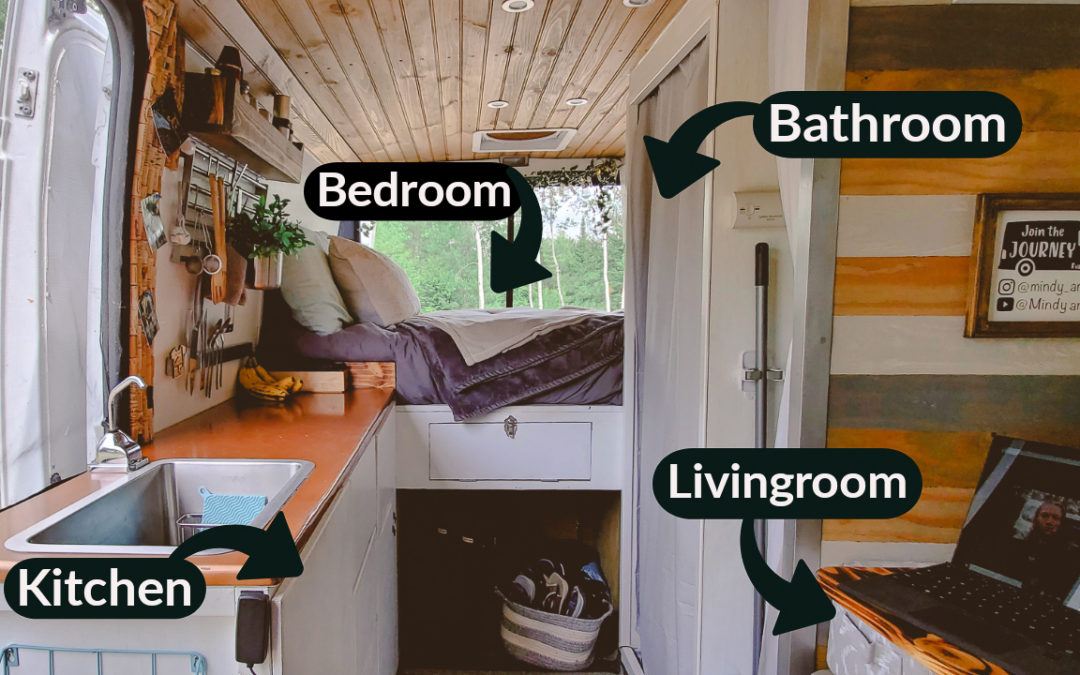
Having some of homes creature comforts were a priority for us. Like having a big fridge, nice toilet, full size sink, just to name a few.
The trickiest part of the build was having all of the features we wanted, while simultaneously being able to fit everything into a 72 square foot space.
We managed to do this without to much compromise.
The Honda Groms that we travel with were the exception to this plan. We had planned on only having 1 bike on the back, that is until Mindy got her motorcycle license. She decided from that day forward, she wanted her own bike. Can you say proud husband moment!
This, of course, meant figuring out how to bring 2 motorcycles with us, in a build that was to far along to change. That is how we ended up with tiny Groms.
We ran into a major problem with the pre manufactured motorcycle carriers, they were just too long off of the back. And this led to our discovery that our hitch receiver was not going to work.

So Joe put on his fabrication pants and in 20 hours, he designed and welded up a custom rack that would go onto to last for 35,000 miles of travel…it now RIP.
Details about what we put in our Van Conversion
We will link our items below so you can easily find them.
Building Odds and Ends
Cargo vans are very loud vehicles and we knew right off the bat we needed to do something about it. Our solution was to use Rattletrap to quiet down our ride. This made a drastic improvement in our ride quality and we highly recommend installing sound deadening material.
Another odd item is our gratuitous use of child safety locks. These are used to keep all of our drawers and doors shut while we drive.
Solar and Charging System
We installed 400 watts of solar panels and have 4 100 amp hour AGM Deep Cycle batteries. This is all controlled by a 40 amp charge controller and 2000 watt inverter charger. We decided on this amount after calculating our average daily consumption of power. This has been plenty for us.
We also installed 2 other ways to charge our batteries. We installed a shore power plug and a battery isolater. The shore power is great when you are stationary for awhile with the option to plug in, but the real winner is the battery isolator. We drive daily and the isolator will charge your batteries using your vehicles alternator. The one we bought is “smart” so it does not allow the battery bank to drain the van battery. It is a one way street for electricity.
Other Electrical Items
After a few test runs, it became clear that adding some external lighting comes in very handy. We added an 18 inch light bar to the front, 12 inch bar in the back, and lights on both sides of the vehicle. All of those are mounted to the custom roof rack Joe welded up.
Inconveniently the Promaster only has one usb plug in the front. After several months of sharing, we decided on upgrading to a 2 port usb. It was a well worth it upgrade.
All of our overhead lights are LED puck lights. They are small and have a very low power consumption.
We also added a LED color changing strip light in the kitchen. We use them every single night. The low output red light is just enough to see but not enough for everyone else to see in. The low red light does not impede your night vision, so it is also great when you need to go outside in the dark.
Van Appliances
We chose to install 2 Max Air Fan Deluxe models. They both have input and output features and can be open in the rain. Air flow is key in a van.
Our fridge is the Dometic CFX 75. This is a dual zone fridge/freezer combo and we absolutely love it. Being a chest style fridge, it keeps the cold air in when the lid is open and it draws very little power.
For our bathroom needs, we ponied up and bought the Cadillac of toilets…a Natures Head Composting toilet. There is a serious learning curve with the thing but we have not regretted spending the money on it. It separates the liquids from the solids. The liquids fill up pretty quick but it is very easy to dump. The composting portion lasts about 2 months from the first use, in our experience.
After being cold to many times, we installed a diesel heater under the passenger seat. This was a total game changer living in a van, we can now camp all 4 seasons.
Water System
We decided to KISS it. Keep it simple stupid. We have a hand pump that feeds out of a 6 gallon jerry can. It then drains from our sink into another 6 gallon jerry can. This system has worked out extremely well and it is easy to fill up almost anywhere.
The sink we chose was the deepest and largest we could fit in our build. We wanted to be able to wash more that one dish at a time and every once and awhile you need to wash your hair without busting out the whole shower.
Speaking of the shower. We also went simple. We have another 7 gallon jug of water and a usb rechargeable pump with a shower head. This allows us to shower inside or outside of the van. The shower is just a stall with a drain and we use bio-degradable soap.
Lounging in a Van
Our bed is a full size 8 inch mattress. The bed is fixed so we have ample storage underneath it.
The couch is designed to extend into lounge mode via a slat system. We also divided that into 2 sides. This way if one of us is lounging, the other can still get into the fridge.
To create more seating, we also installed a swivel mount for the passenger seat.
That is all of the major items. Don’t forget to watch the video for the full tour of our van.
Below is a complete list of products we used during our build. (This is a work in progress, come back soon for the compete list)
Van Build Parts List
Building Odds and Ends
DIY Solar Set-up
Other Electrical
Appliances
Water System
Thank you for checking out our build. This article is a very broad overview of what is going on in the van. Checkout our blog for more detailed articles on how we built the van. We are working on adding those articles, so you can look forward to seeing those in the near future.
Thanks again,
Joe (and Mindy)


